
Security teams are often overwhelmed with alerts daily, including false positives, and actions that require attention but might be placed on the back burner. But when alerts start stacking up and aren’t addressed promptly, important security concerns might go unnoticed, and these can spiral into a data breach. The time to detect and respond to security incidents should be as short as possible to limit the time an attacker can carry out an attack.
A solution, incident response automation, enables security teams to reduce the time spent on standard, repetitive response measures and dedicate more time to addressing timely security concerns. In this blog, we’ll see how Log360 helps the IT security team accomplish automated incident responses. To demonstrate, we’ll use the scenario of a simple brute-force attack in the network.
Here are the five steps to automate incident response processes in Log360:
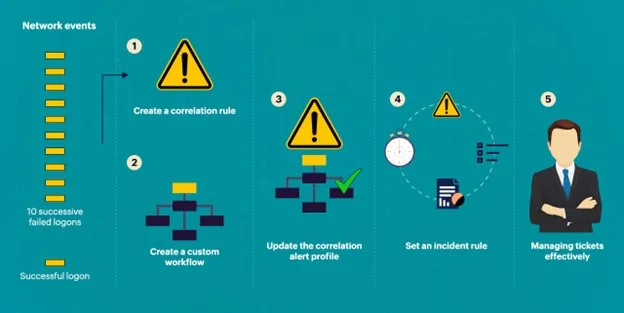
Figure 1: This image provides an overview of the five steps to automate incident response.
1. Create a correlation rule
Under the correlation tab, you can create a correlation rule to detect a brute-force attack by specifying network actions and threshold levels. In the image below, we have set the rule assuming that a brute-force attack pattern consists of several unsuccessful logon attempts (Action 1) followed by a successful logon (Action 2). The action’s duration and frequency are specified by the threshold limit.
An effective SIEM solution with a correlation engine should allow custom actions and provide a wide range of preset actions.
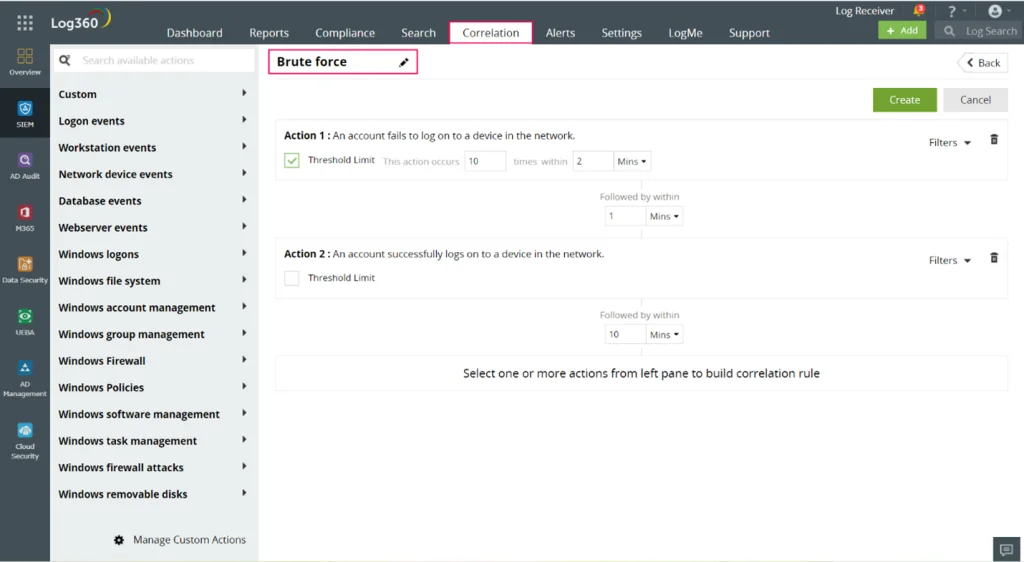
Figure 2 : This is a screenshot of the correlation rule creation feature in Log360.
2. Create the workflow
Under the Alerts tab, you can build the response workflow for a brute-force attack alert by selecting Create New Workflow. The visual builder lets you create the response action with an easy drag-and-drop option. Automated Incident Response.
First, log off the device. Next, disable the user. When successful, an SMS is sent to notify the user. If disabling the user is not successful, a decision logic alert will notify the IT admin.
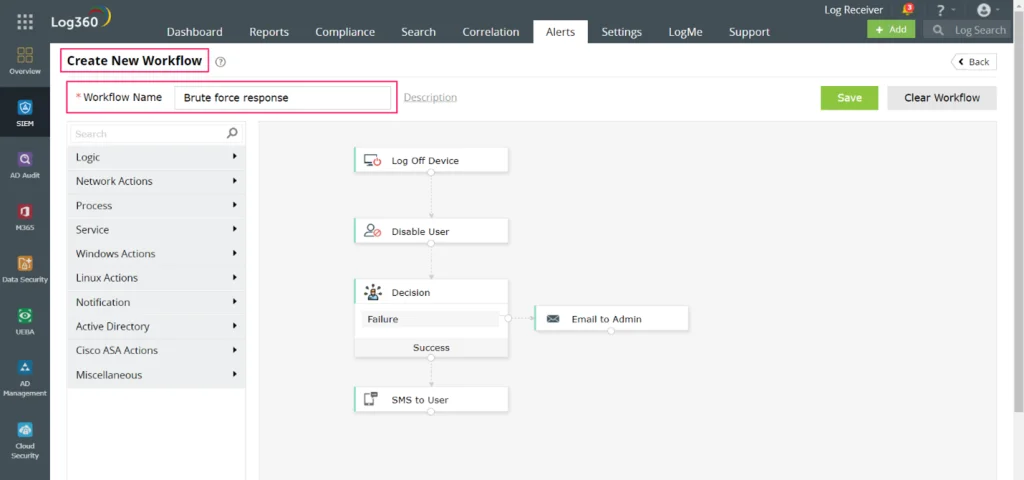
Figure 3: This is a screenshot of workflow builder in Log360.
3. Update the correlation alert profile
In the manage profile section under the Alerts tab, you will find the correlation alert profile we created in step 1. You can now update the alert profile by assigning the response workflow and setting severity.
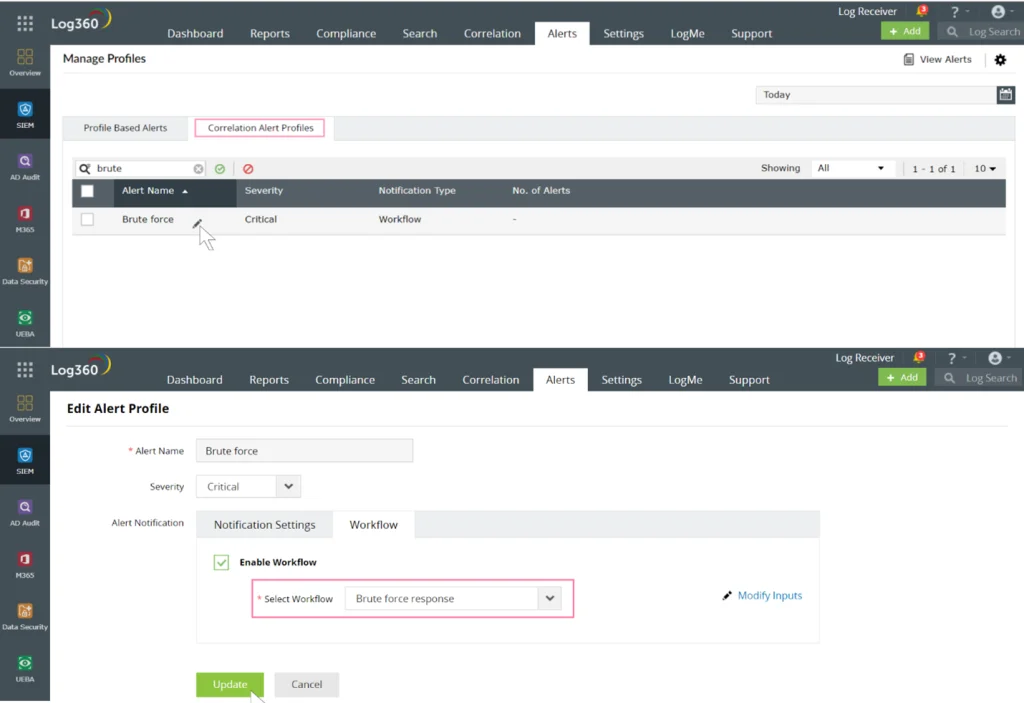
Figure 4: This image shows how you enable workflow to the correlation alert profile.
4. Set an incident rule
Using incident rules, you can automatically create incidents as soon as an alert profile is triggered. The incidents section enables you to more effectively manage alerts by allocating severity to incidents, monitoring their time and status, and assigning the appropriate person for closing and investigating.
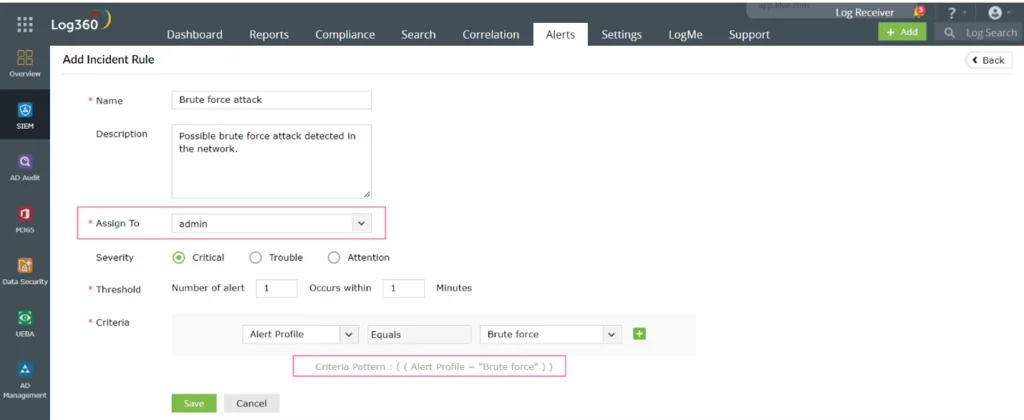
Figure 5: This image shows how you can create an incident rule for an alert profile.
5. Manage tickets effectively
You can automatically create external tickets for the desired alert profile by integrating with ticketing or help desk tools.The alert details are forwarded to the ticketing tool so that the designated technician in your organization can investigate further as needed.
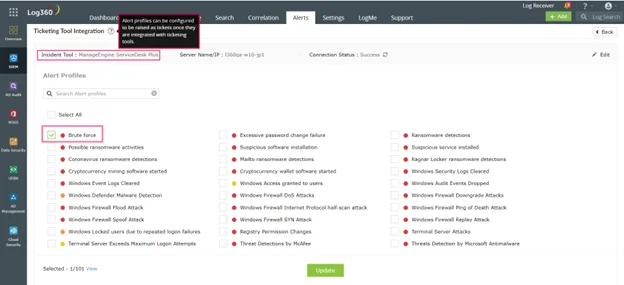
Figure 6: This screenshot shows how to create automatic tickets for alert profiles using Log360.
To easily understand the process of automated incident response, we used a simple use case of a brute-force attack. However, you can create custom correlation rules and workflows to detect and respond to complex cyberattacks.
With the incident response capability from Log360, SOCs can automatically correlate suspicious events, prioritize alerts based on severity, trigger the first line of defense with automated response workflows, and manage incidents centrally.
Interested in a personalized product demo? click here